
Change IP Address in Chrome
A "how to" provided by iPrivacyTools.Blogspot.com
This page describes how to change the IP of Chrome through the use of an Internet relay (known as a proxy). Both free and paid options are mentioned below.
IMPORTANT NOTE: Chrome uses the proxy/relay settings of Internet Explorer, so following the instructions below will also affect the IP of Internet Explorer. If you'd like to surf with your regular IP on one browser at the same time, then you'll need to install/use Firefox (or use Safari if you're on Mac).
STEP #1 to change IP address in Chrome
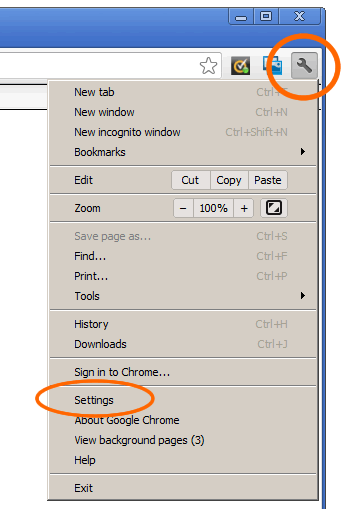
STEP #2 to change your IP address in Chrome
- Scroll to the bottom of that page and click the Advanced link.
- In the "Network" area, click Change proxy settings...
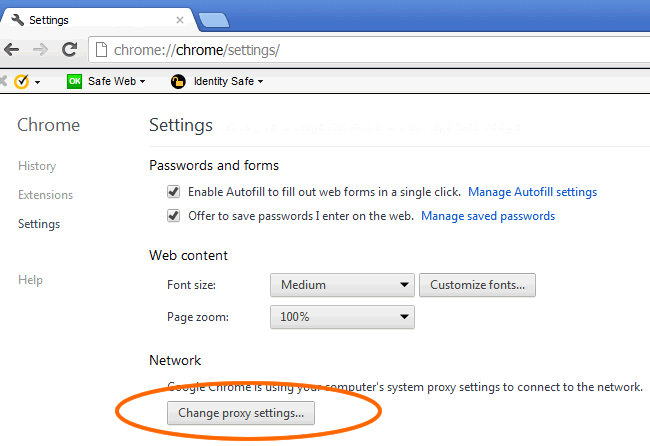
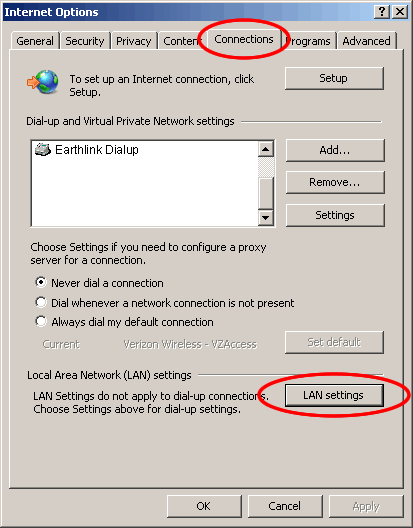
STEP #3
- Click "Connections" and then "LAN Settings"
STEP #4
- Check the box for "Use a proxy server".
- Check the box "Bypass proxy server for local addresses"
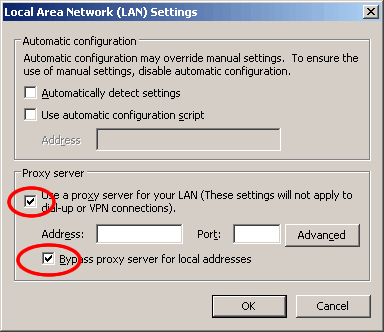
STEP #5 to change IP address of Chrome
- For "Address", enter the IP valid proxy server and its port (see instructions below for where to get these settings)
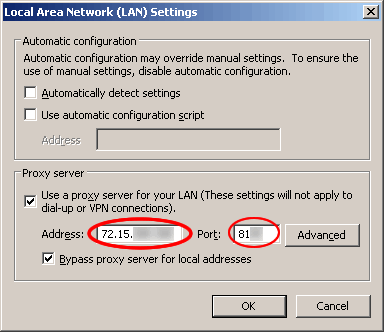
The "address" field requires the IP of a proxy server. You can find a free public proxy, or use a private one from our service or another.
In general, private settings are much safer, but many people still use free/"public" settings. Be aware of the risks, be sure to use antivirus protection, and confirm that you're on SSL if submitting forms while using free settings. If changing your Chrome IP address is frequently needed, then it would be safer to use paid, private, fully ssl compatible settings.
Last Step!
- Click OK to complete the setup process.
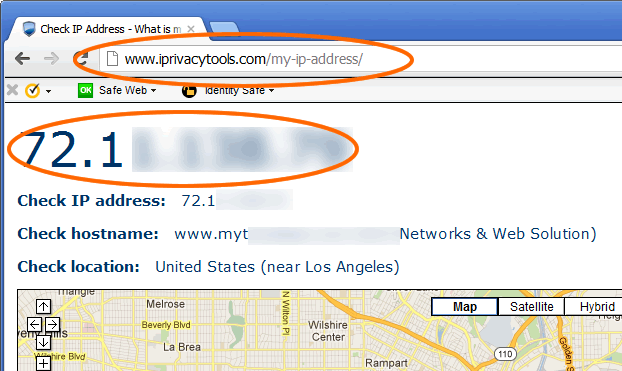
- Go to iPrivacyTools.com/my-ip-address/ to confirm the change of your IP address.
IMPORTANT: How to get your original IP back
Finally, to get your regular Internet connection back at anytime, simply repeat steps 1-4, but in step #4 you simply UNcheck the box for "Use a proxy server".
No comments:
Post a Comment